Building A Keyboard - My Dactyl Build Journal
A few years ago, I began having shoulder and neck pain. Looking to improve the ergonomics of my setup, I began researching keyboards.
If you've never had the pleasure, picking a keyboard is like finding a doctor; you're clueless, the advice is conflicting, and it's unclear which choice will net you a few extra miles from your flesh and bones.
After reviewing what literature I could, the impression I came away with was this:
Everybody is happy with something different, and there are no rules.
And there's a lot on offer:
- Jointed split layouts.
- Full-split keyboards with two halves.
- Ortholinear switch placement.
- Contoured keys.
- Thumb clusters.
- Wrist rests.
- Ornamental escape keys.
- Elaborate buying clubs.
- Keycap hunting.
- Wall-sized display cases.
- Room-sized display cases.
- And so on.
Ultimately I decided I wanted something with mechanical switchs, recessed keys, an ortholinear layout, and fully-split so I could open my chest more while working. Initially, I thought I'd give up the split and go for the Kinesis Advantage, but then I discovered the Dactyl. A fully-split, ortholinear, contoured board I could print myself? How cool is that?
What you'll need
Here's my parts list:
- Cherry MX Clears (70)
- 1N4148 diodes (70)
- Teensy 2.0
- MCP23018 (I'd recommend a backup)
- TRRS cable
- TRRS jacks (2)
- Gel wrist rests (2)
- #6-32 machine screws
- #6-32 square nuts
- Colored 22 gauge wire
- 1x1 Key caps (66) - I went with Blade Runner-inspired DSAs
- 2x1 Key caps (4) - I used orange blanks
- 2200K Resistors (2)
The case itself includes a place to attach an 18mm panel mount cable. The only one I could find was USB micro, which necessitates a USB Mini to USB Micro adapter. I ended up running a male-to-female extension out of the hole and plugging it in there instead.
I also took Matt Adereth's advice and bought a switch tester to figure out which switches I'd buy. I settled on the Cherry MX Clears, which seemed the least likely to drive my coworkers crazy.
Printing
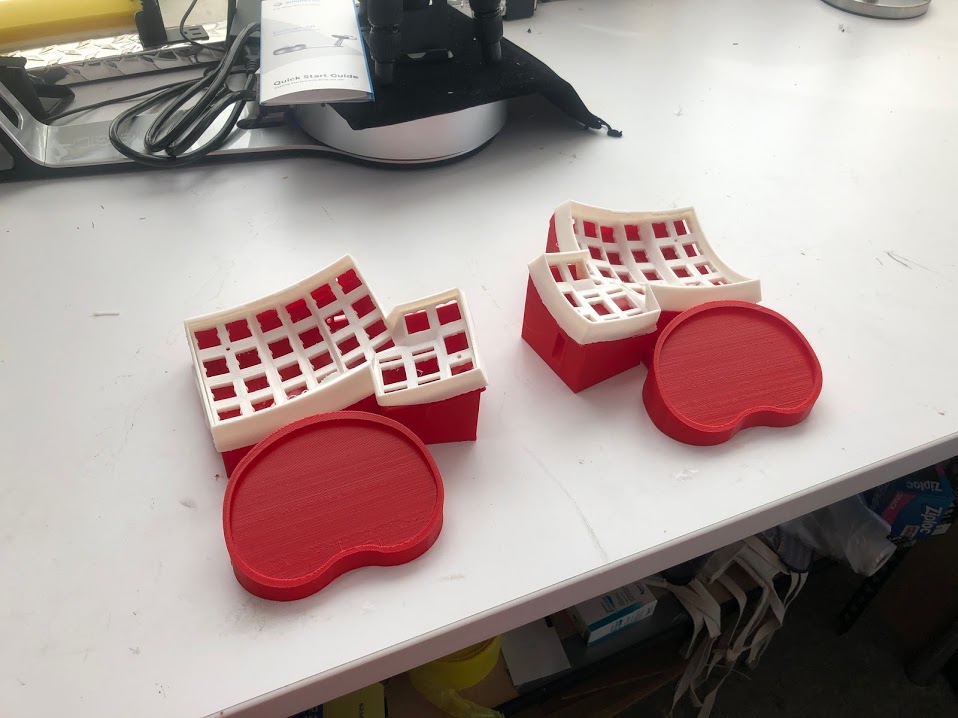
I'm lucky to have access to free PLA and print time at work. I opted for a variation of the original base which added wrist rests and a roomier enclosure for the switches.
The print came out... okay. I'm new to 3D printing; outside a badge holder, this was the first thing I'd ever printed. I suspect a little more familiarity with the practice would have gone a long way; c'est la vie.
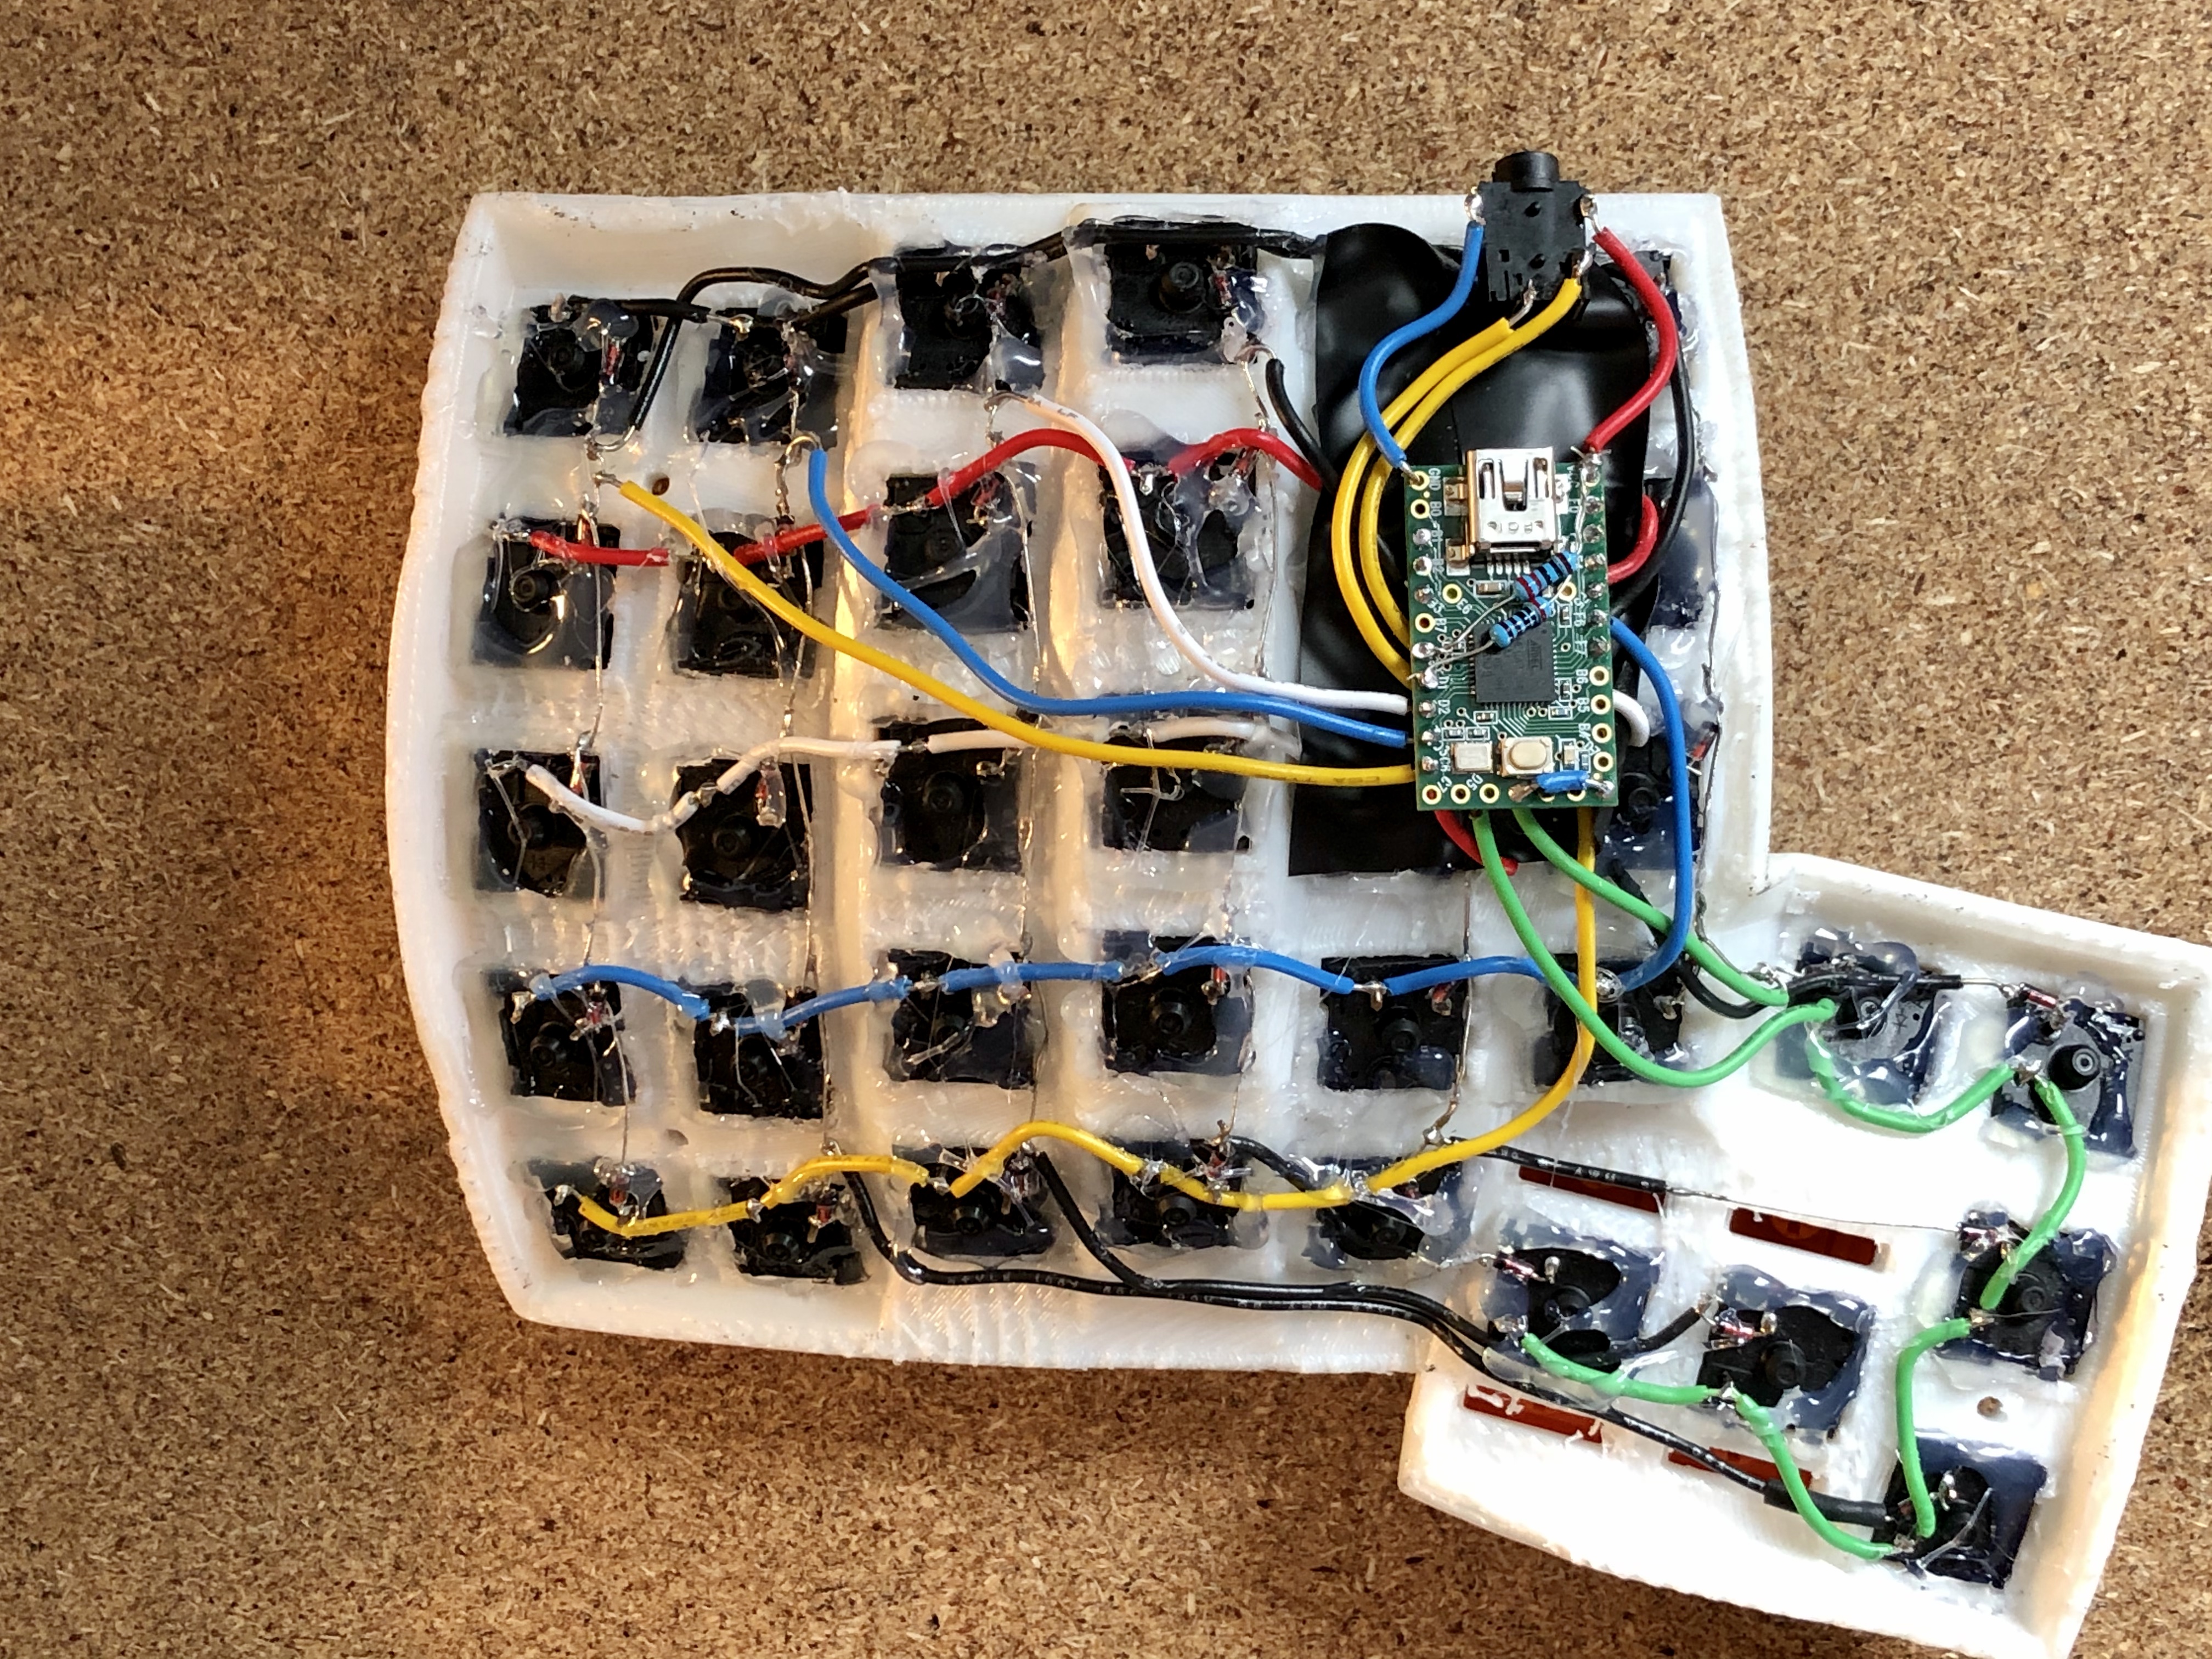
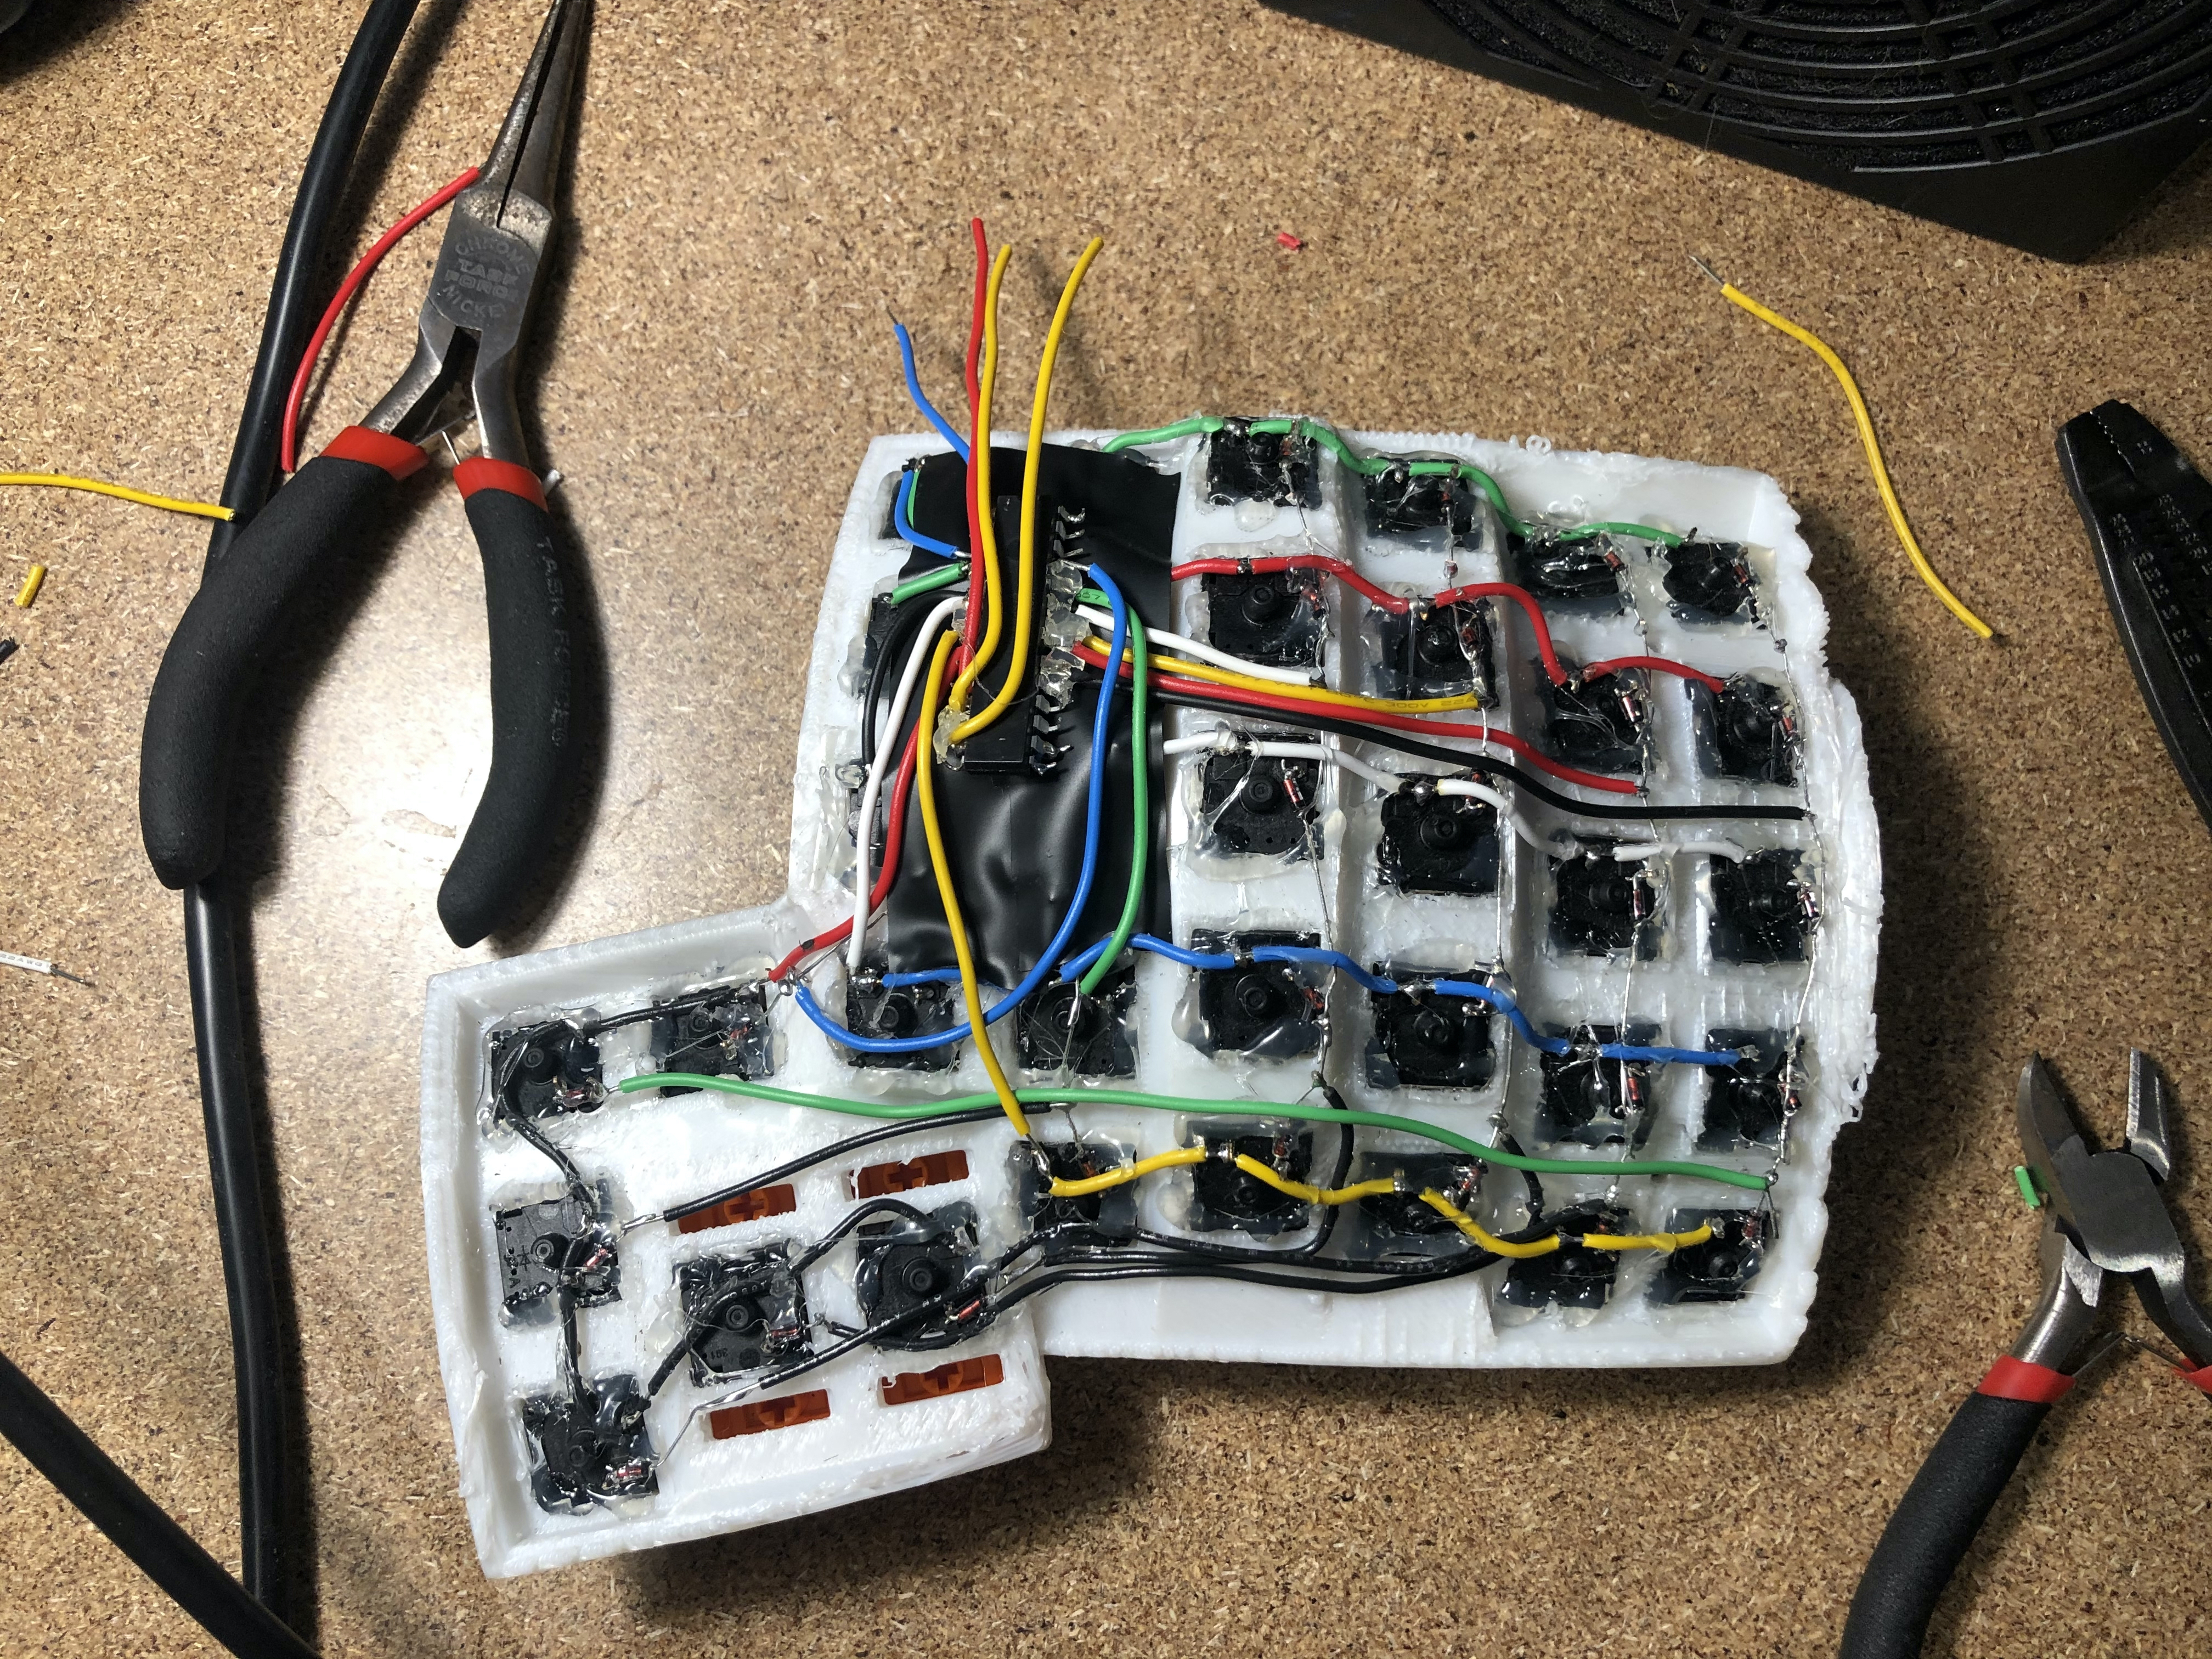
Wiring
The included instructions offered two paths:
- Print the circuits on copper paper and etch them with acid
- Hand wire everything
The printing instructions were intimidating, so I went the hand-wired route. Hand soldering boils down to:
- Wiring the diodes to one arm of each switch
- Solder the diodes to each other to form columns
- Wire the rows to each switch
- Wire the MCP (IO expander) and Teensy 2.0 to the rows/columns
- Wire the TRRS jacks
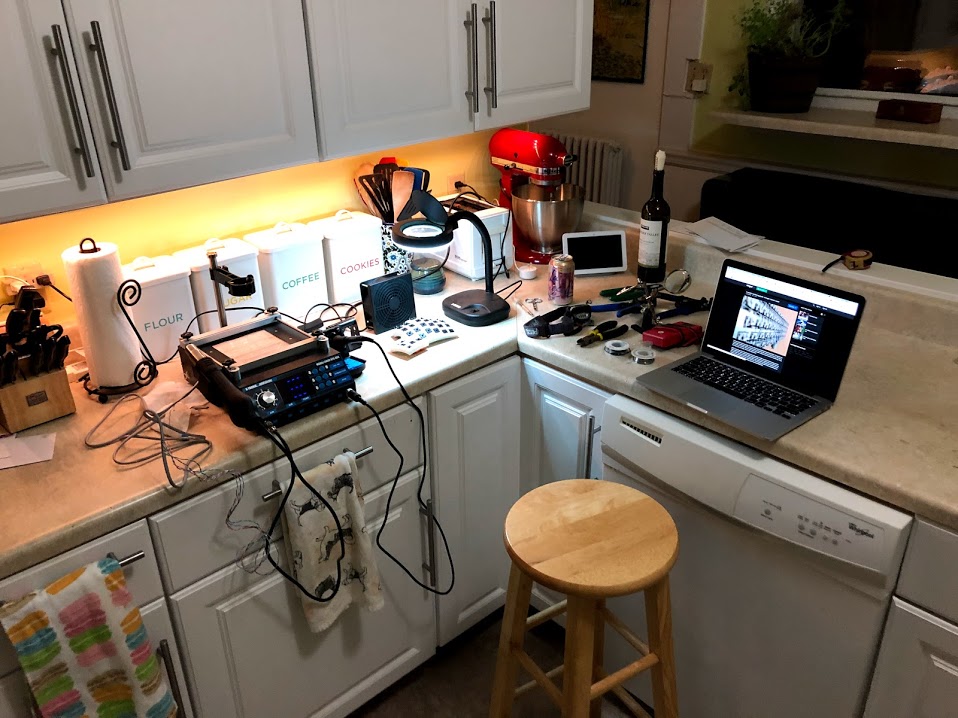
Not having a suitable workbench, I cleared off the kitchen counter and set to work.
Wiring the diodes
I was lucky to stumble upon a great collection of keyboard hand-wiring tips. The author recommended wiring columns by tightly wrapping one arm of the diode around a switch leg, then soldering the other arms together.
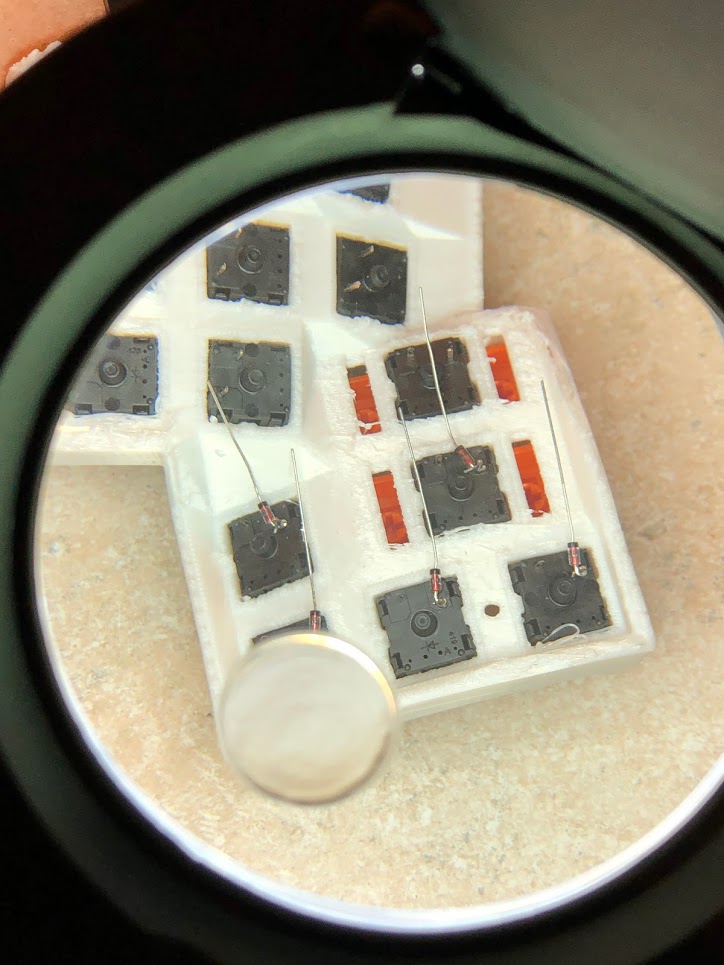
Use needlenose pliers to form the loops, then apply a drop of solder. I squeezed the loops on the pin before soldering.
Columns
Once the diodes are in place, solder each to the next in the column.
Each of the thumb cluster switches have to be wired to a different column; my initial wiring took too much space, so check the later photos if you need a reference. There's not a lot of space in the original Dactyl case!
Wire the switch rows
For the rows, I again used the techniques from the keyboard hand-wiring tips. First, I laid the wire across the switches and marked where it crossed the switch arms. Then I split away the sheathing using wirestrippers at the marks.
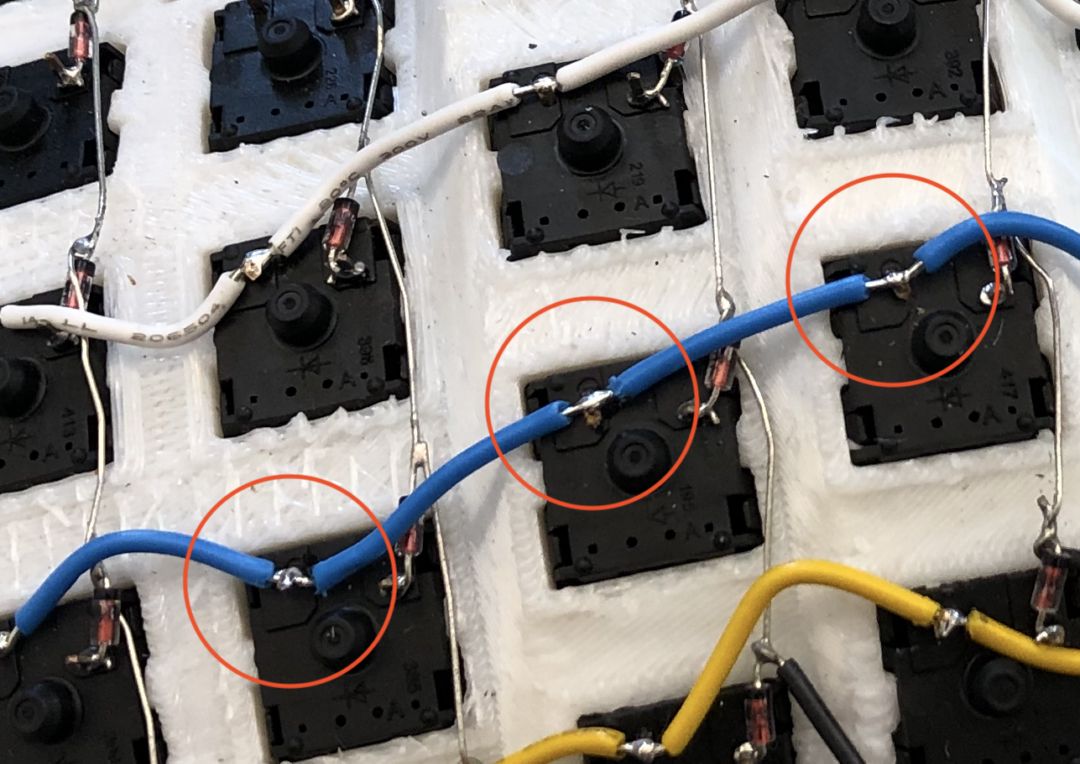
I laid the wire across the switch pins, bent the pins over the wire and soldered them in place. I used 22 gauge wire, but most guides used magnet wire instead which seems like a better choice.
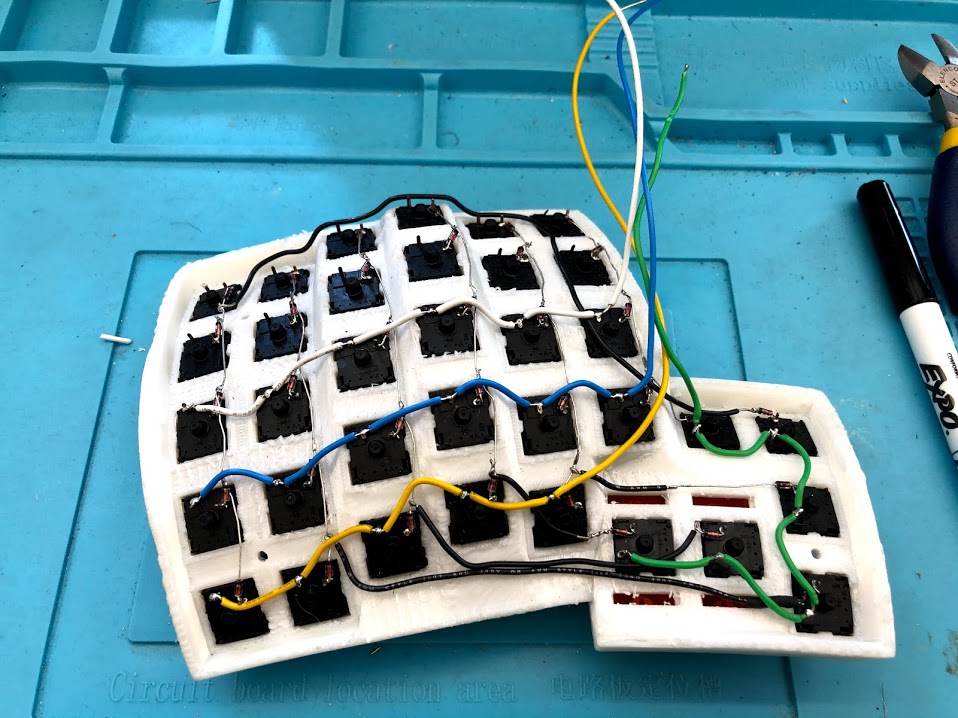
I left plenty of excess, planning on trimming the wires to size after positioning the Teensy and I/O expander. This also made breadboarding much easier.
Wire the TRRS Jacks
This step was pretty painless; I soldered wires into the Teensy/MCP ahead of time, test fit where the jack would sit, cut the wires to size and soldered the on. There was enough play in the wire to reposition the jack when the time for the final fit came.
Breadboarding
After testing all the rows and columns with a voltometer, I breadboarded the circuit to work out any remaining kinks.
I thought the header pins would be sufficiently snug to test, but ended up being wrong about that (not until after I had ordered another Teensy, though).
Once I was satisfied that things worked as intended, I moved on to the final steps of soldering things in place.
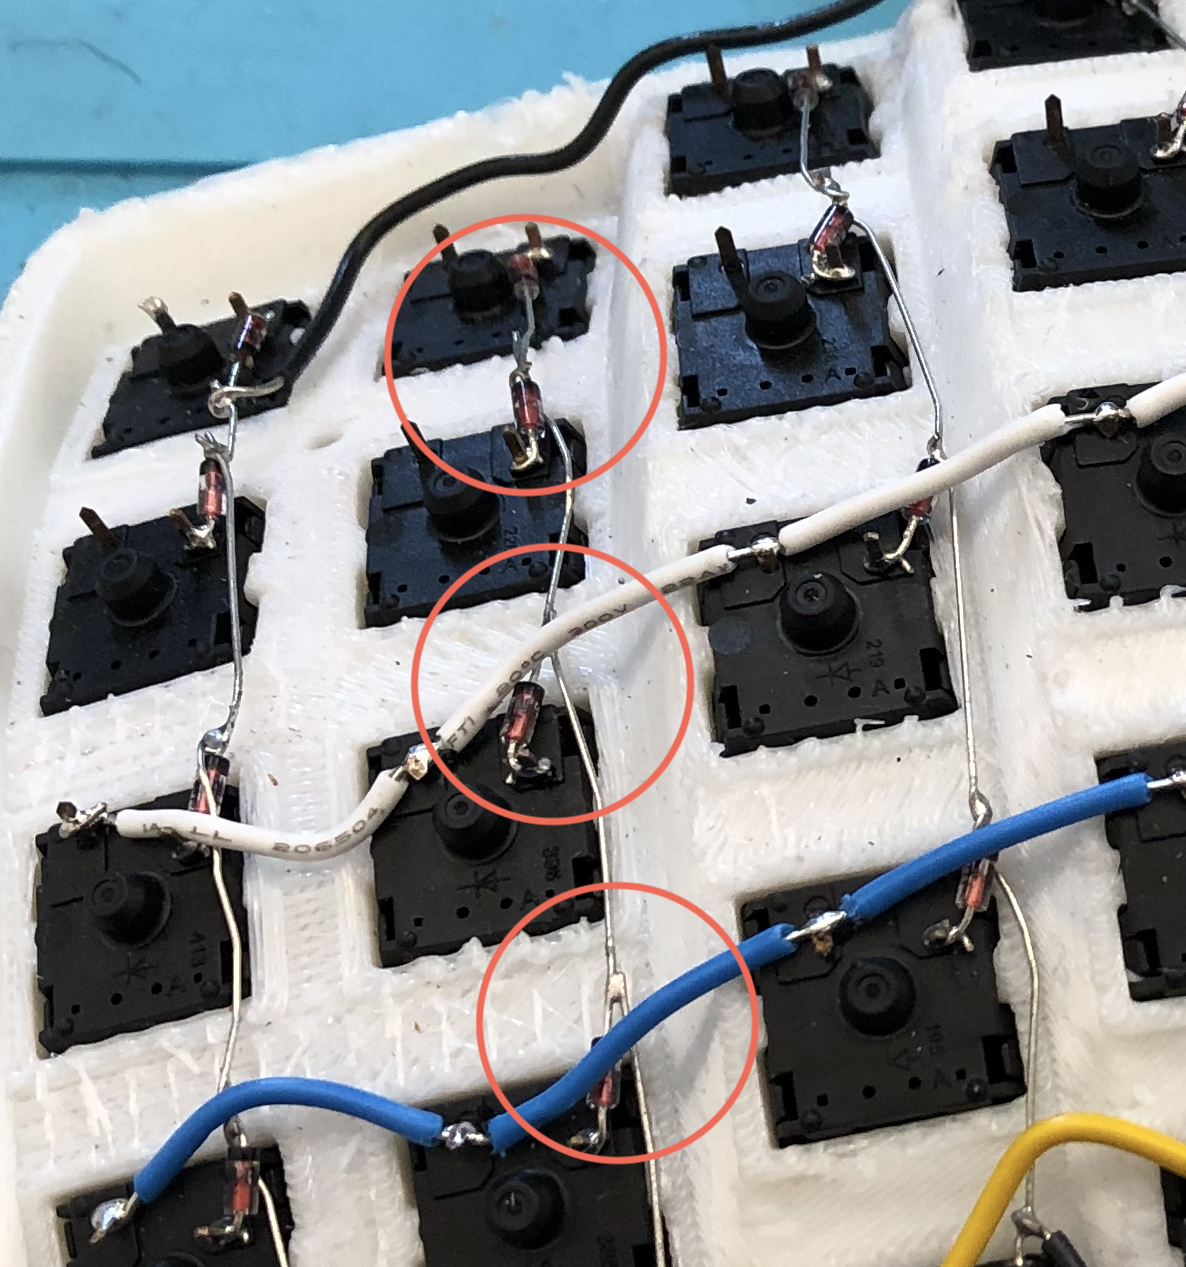
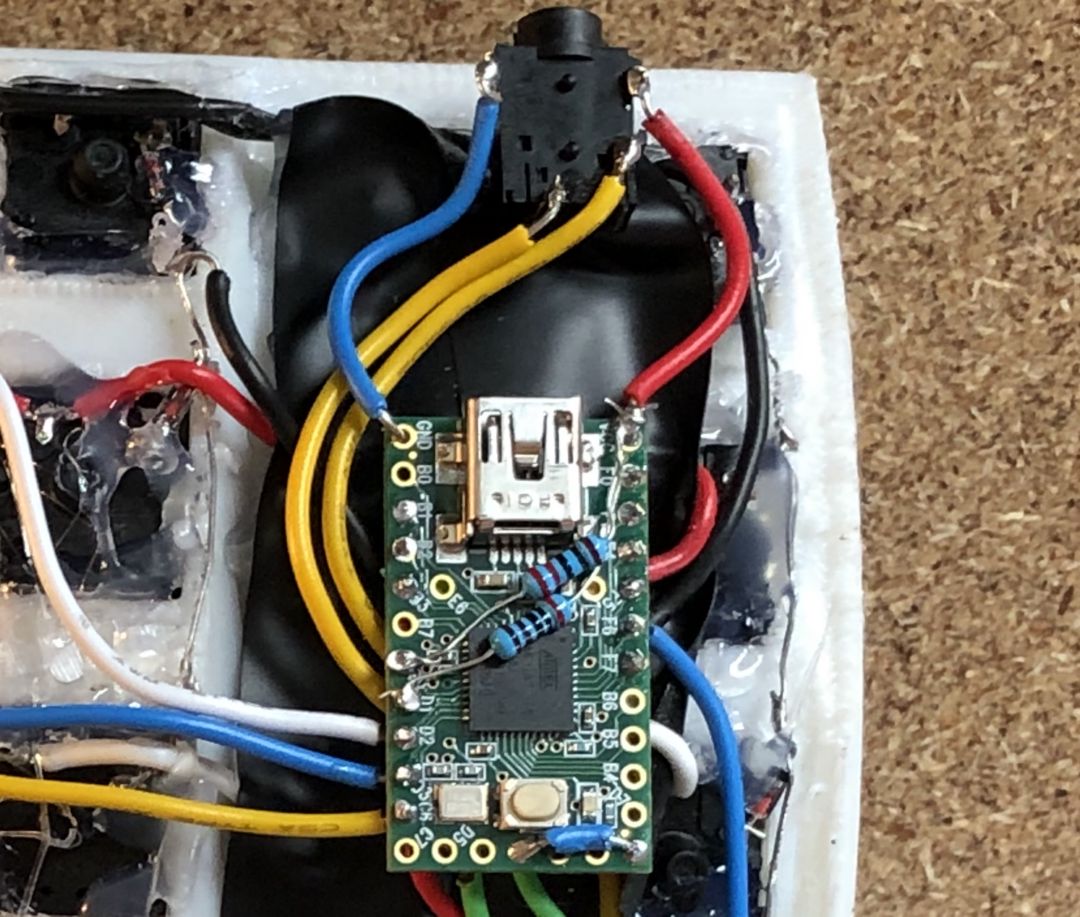
Wiring the Teensy
Wiring the Teensy was pretty straightforward. The guides I found the most useful were:
- The original guide from Matt Adereth (thanks again!)
- Joe Devivo's Dactyl QMK build guide.
Both wiring diagrams had some vestigial connections that I've marked off below.
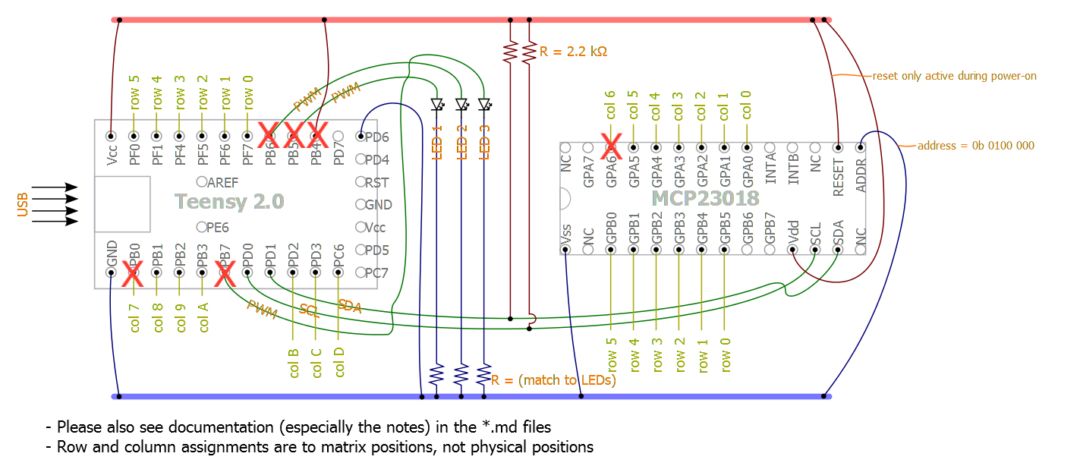
Courtesy Matt Adereth/Joe Devivo
Per my original plan, I trimmed the wires and soldered them in place. This approach worked pretty well for the Teensy side, but wasn't as successful on the opposite hand.
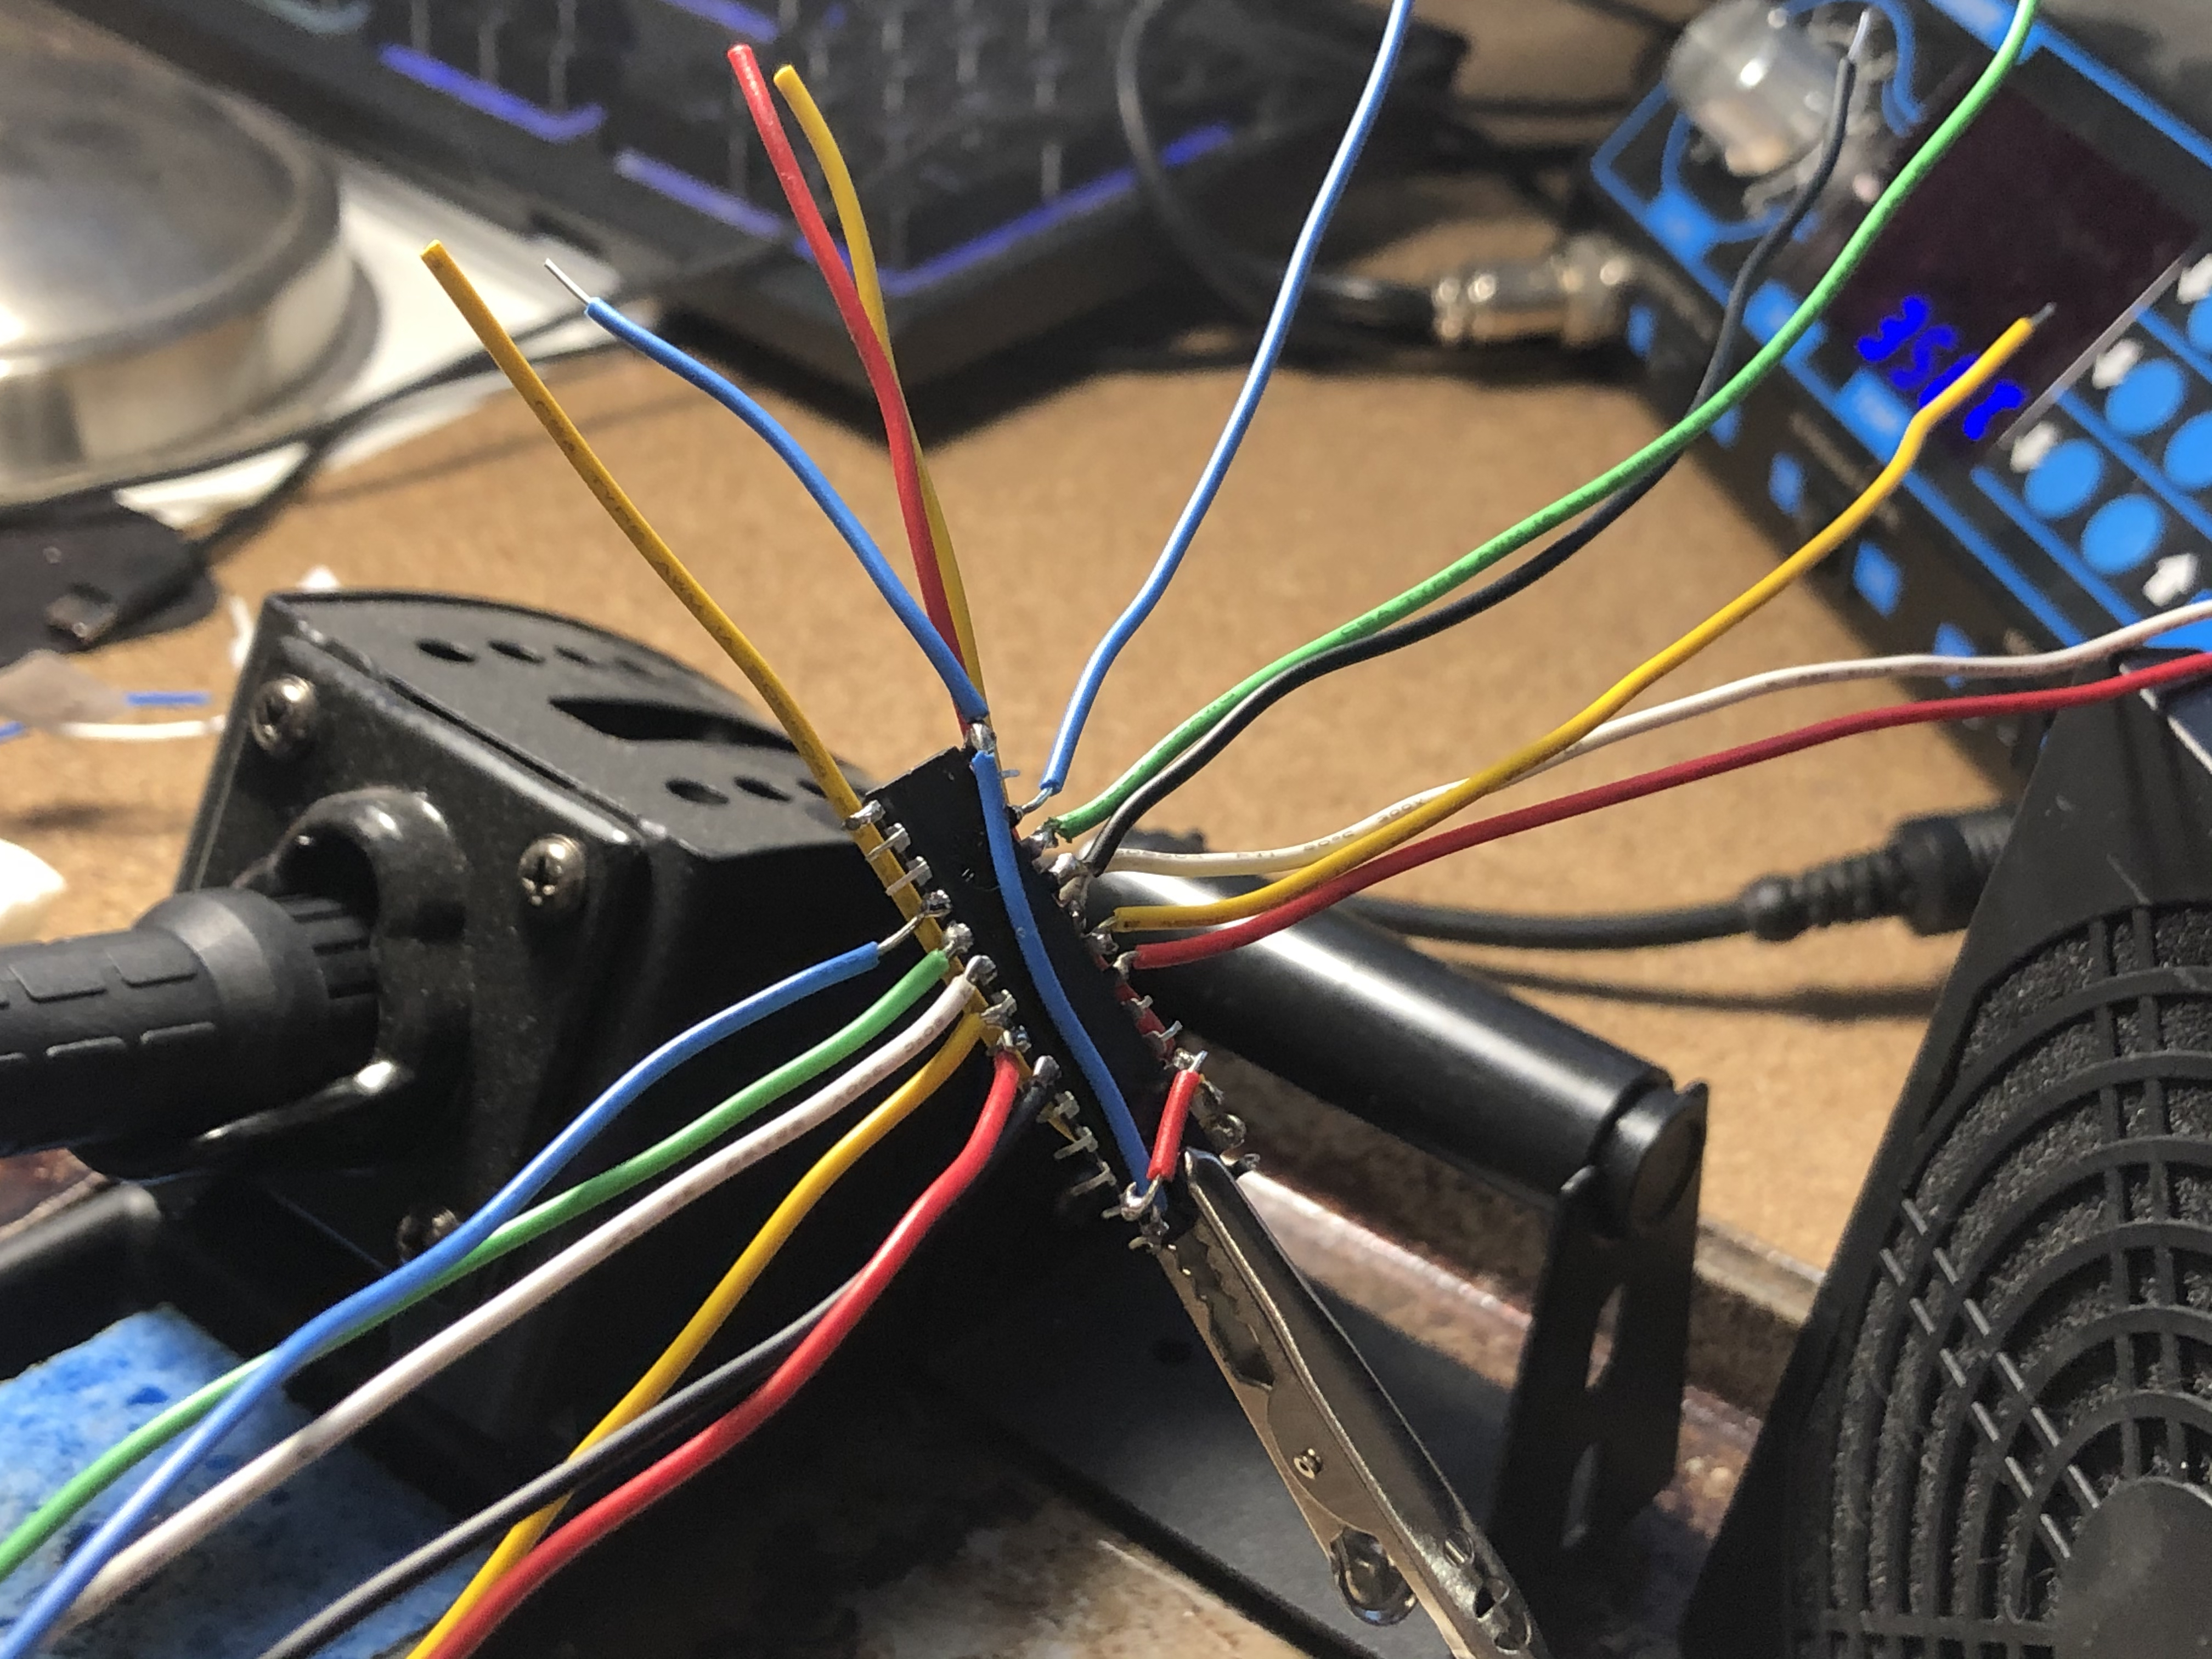
Wiring the MCP23018
Wiring the I/O expander was a little trickier; I tried the same approach of leaving some extra wiring and trimming it to fit after positioning the expander, but this turned out to be pretty difficult.
Getting the wires soldered to the pin was a challenge; I bent the pins 90 degrees with a needlenose, then soldered wires to them with my "helping hand".
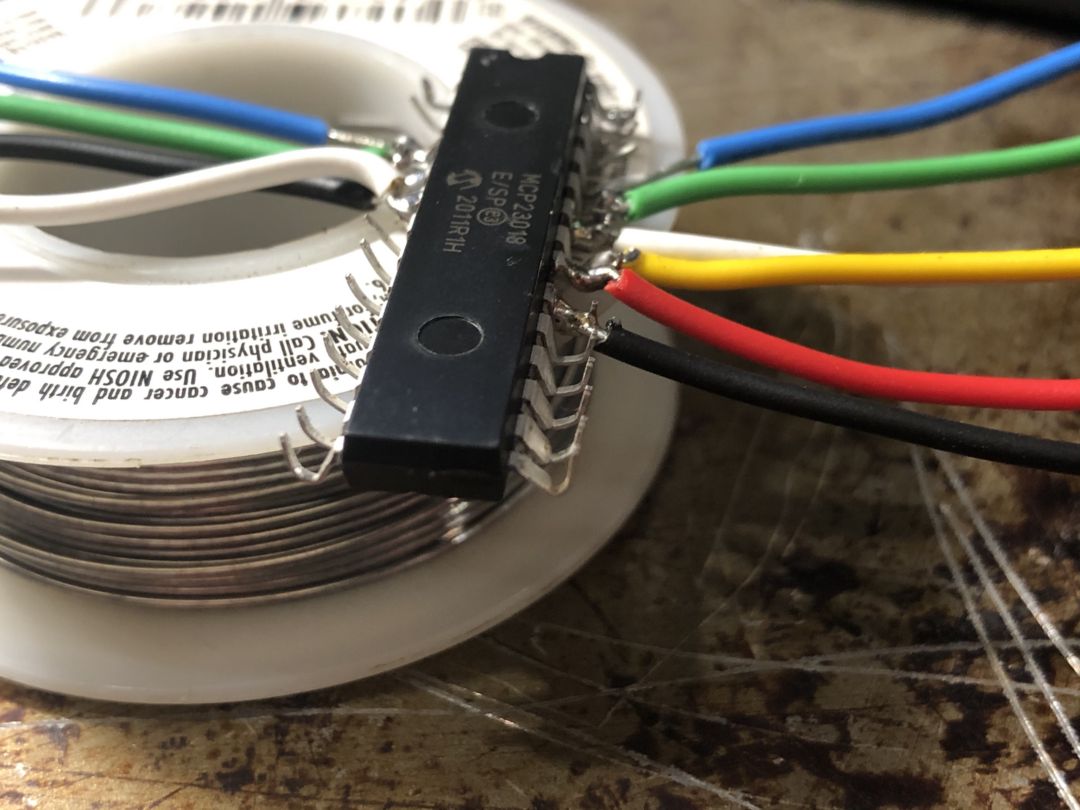
Note that I ran two behind the MCP, which helped with keeping things tidy.
And then soldering them to the rows and columns wasn't much easier:
At first blush things seemed okay, but then I realized I had shorted two columns together. While trying to fix that, the pins fell out, leaving me waiting for a replacement in the mail.
When the new MCP arrived, I soldered it to some leftover PCB from another project. This made things much easier.
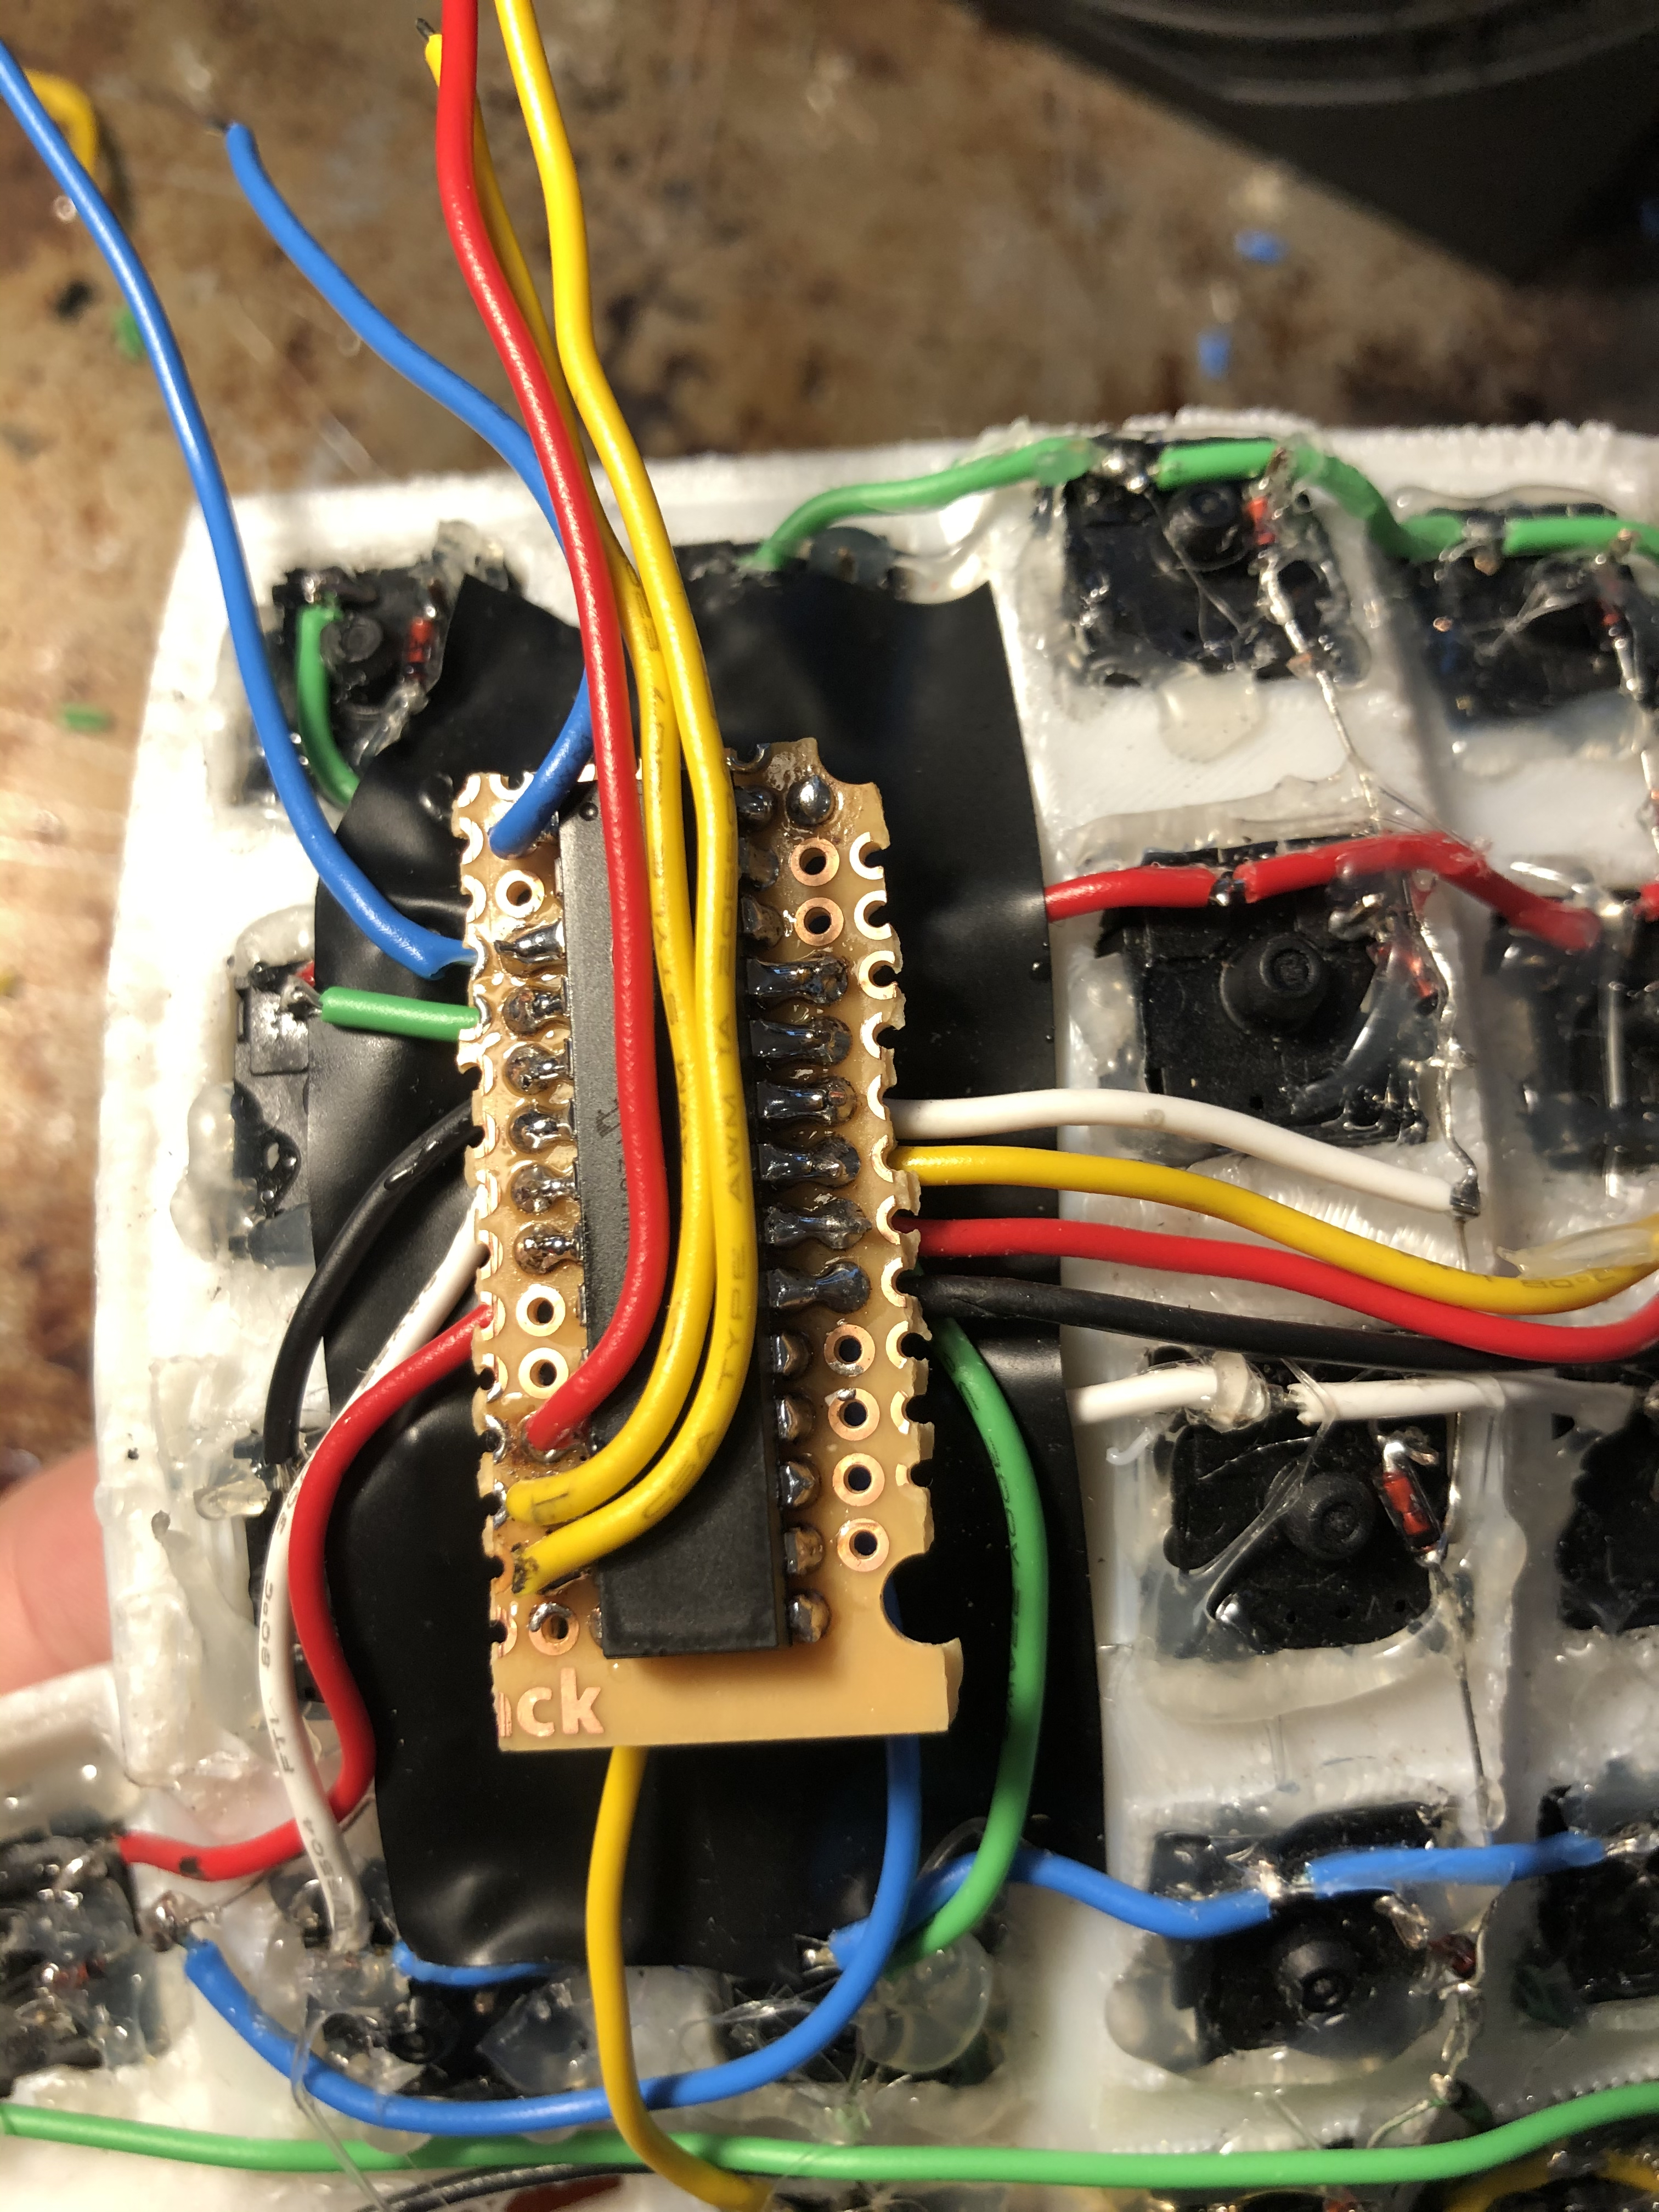
(If you're using this as a reference: the top-right blob of solder was a mistake.)
Some final useful resources for the novice:
Installing QMK
In parallel to getting things soldered together, I flashed QMK onto the Teensy. Troubleshooting might be a thing for you (it certainly was for me). Here in no particular order are some tips and tricks to help you along the way:
- Setting up the QMK environment is a must. This unlocks the ability to both customize your layout and muck around with QMK's internals.
- QMK has a simple key tester for sanity checking key presses.
- The testing and debugging instructions are useful,
should you need to go the old
print("here")route. - The QMK Toolbox is very helpful for flashing/debugging.
- Teensy offers an HID Listen program and a flashing utility, but the QMK Toolbox supersedes these both.
Once you've gotten things booted, I'd recommend printing out the layout you use (e.g. the dactyl/default) and keeping it handy for a few days, just in case.
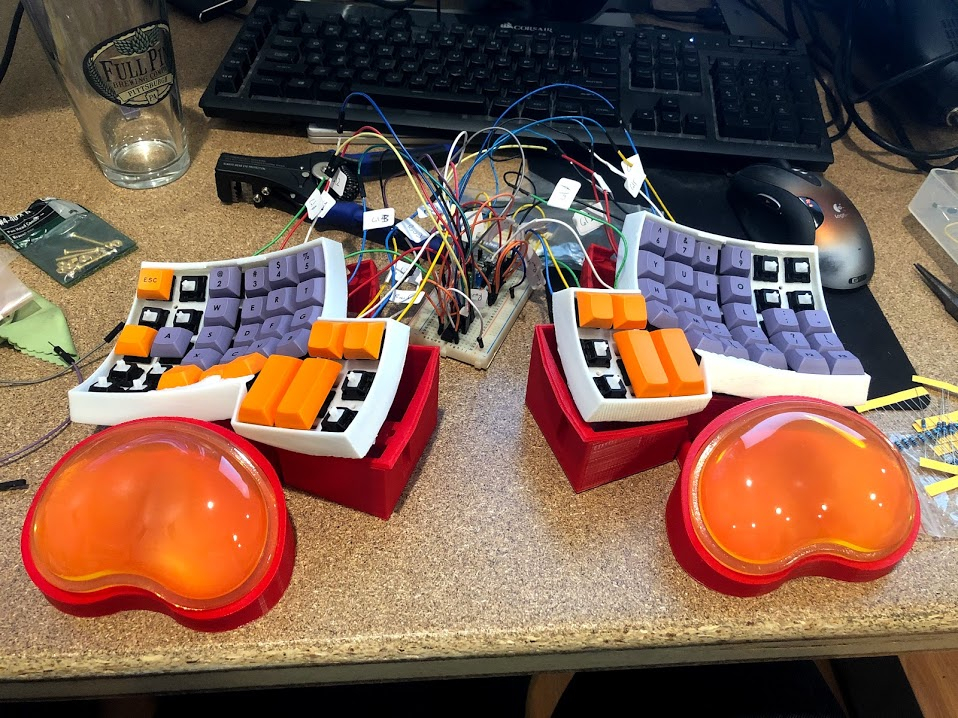
The Finished Product
Before sealing up the case, I decided to spray paint the wrist rests black. Here are the glamour shots:
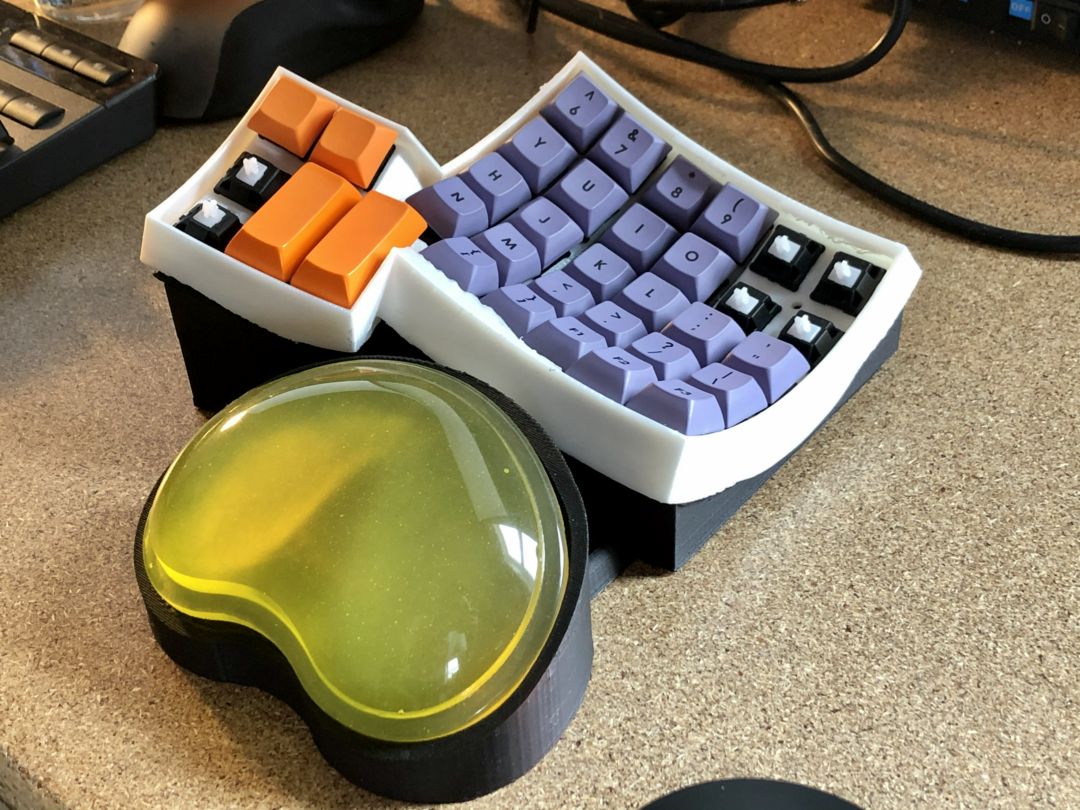
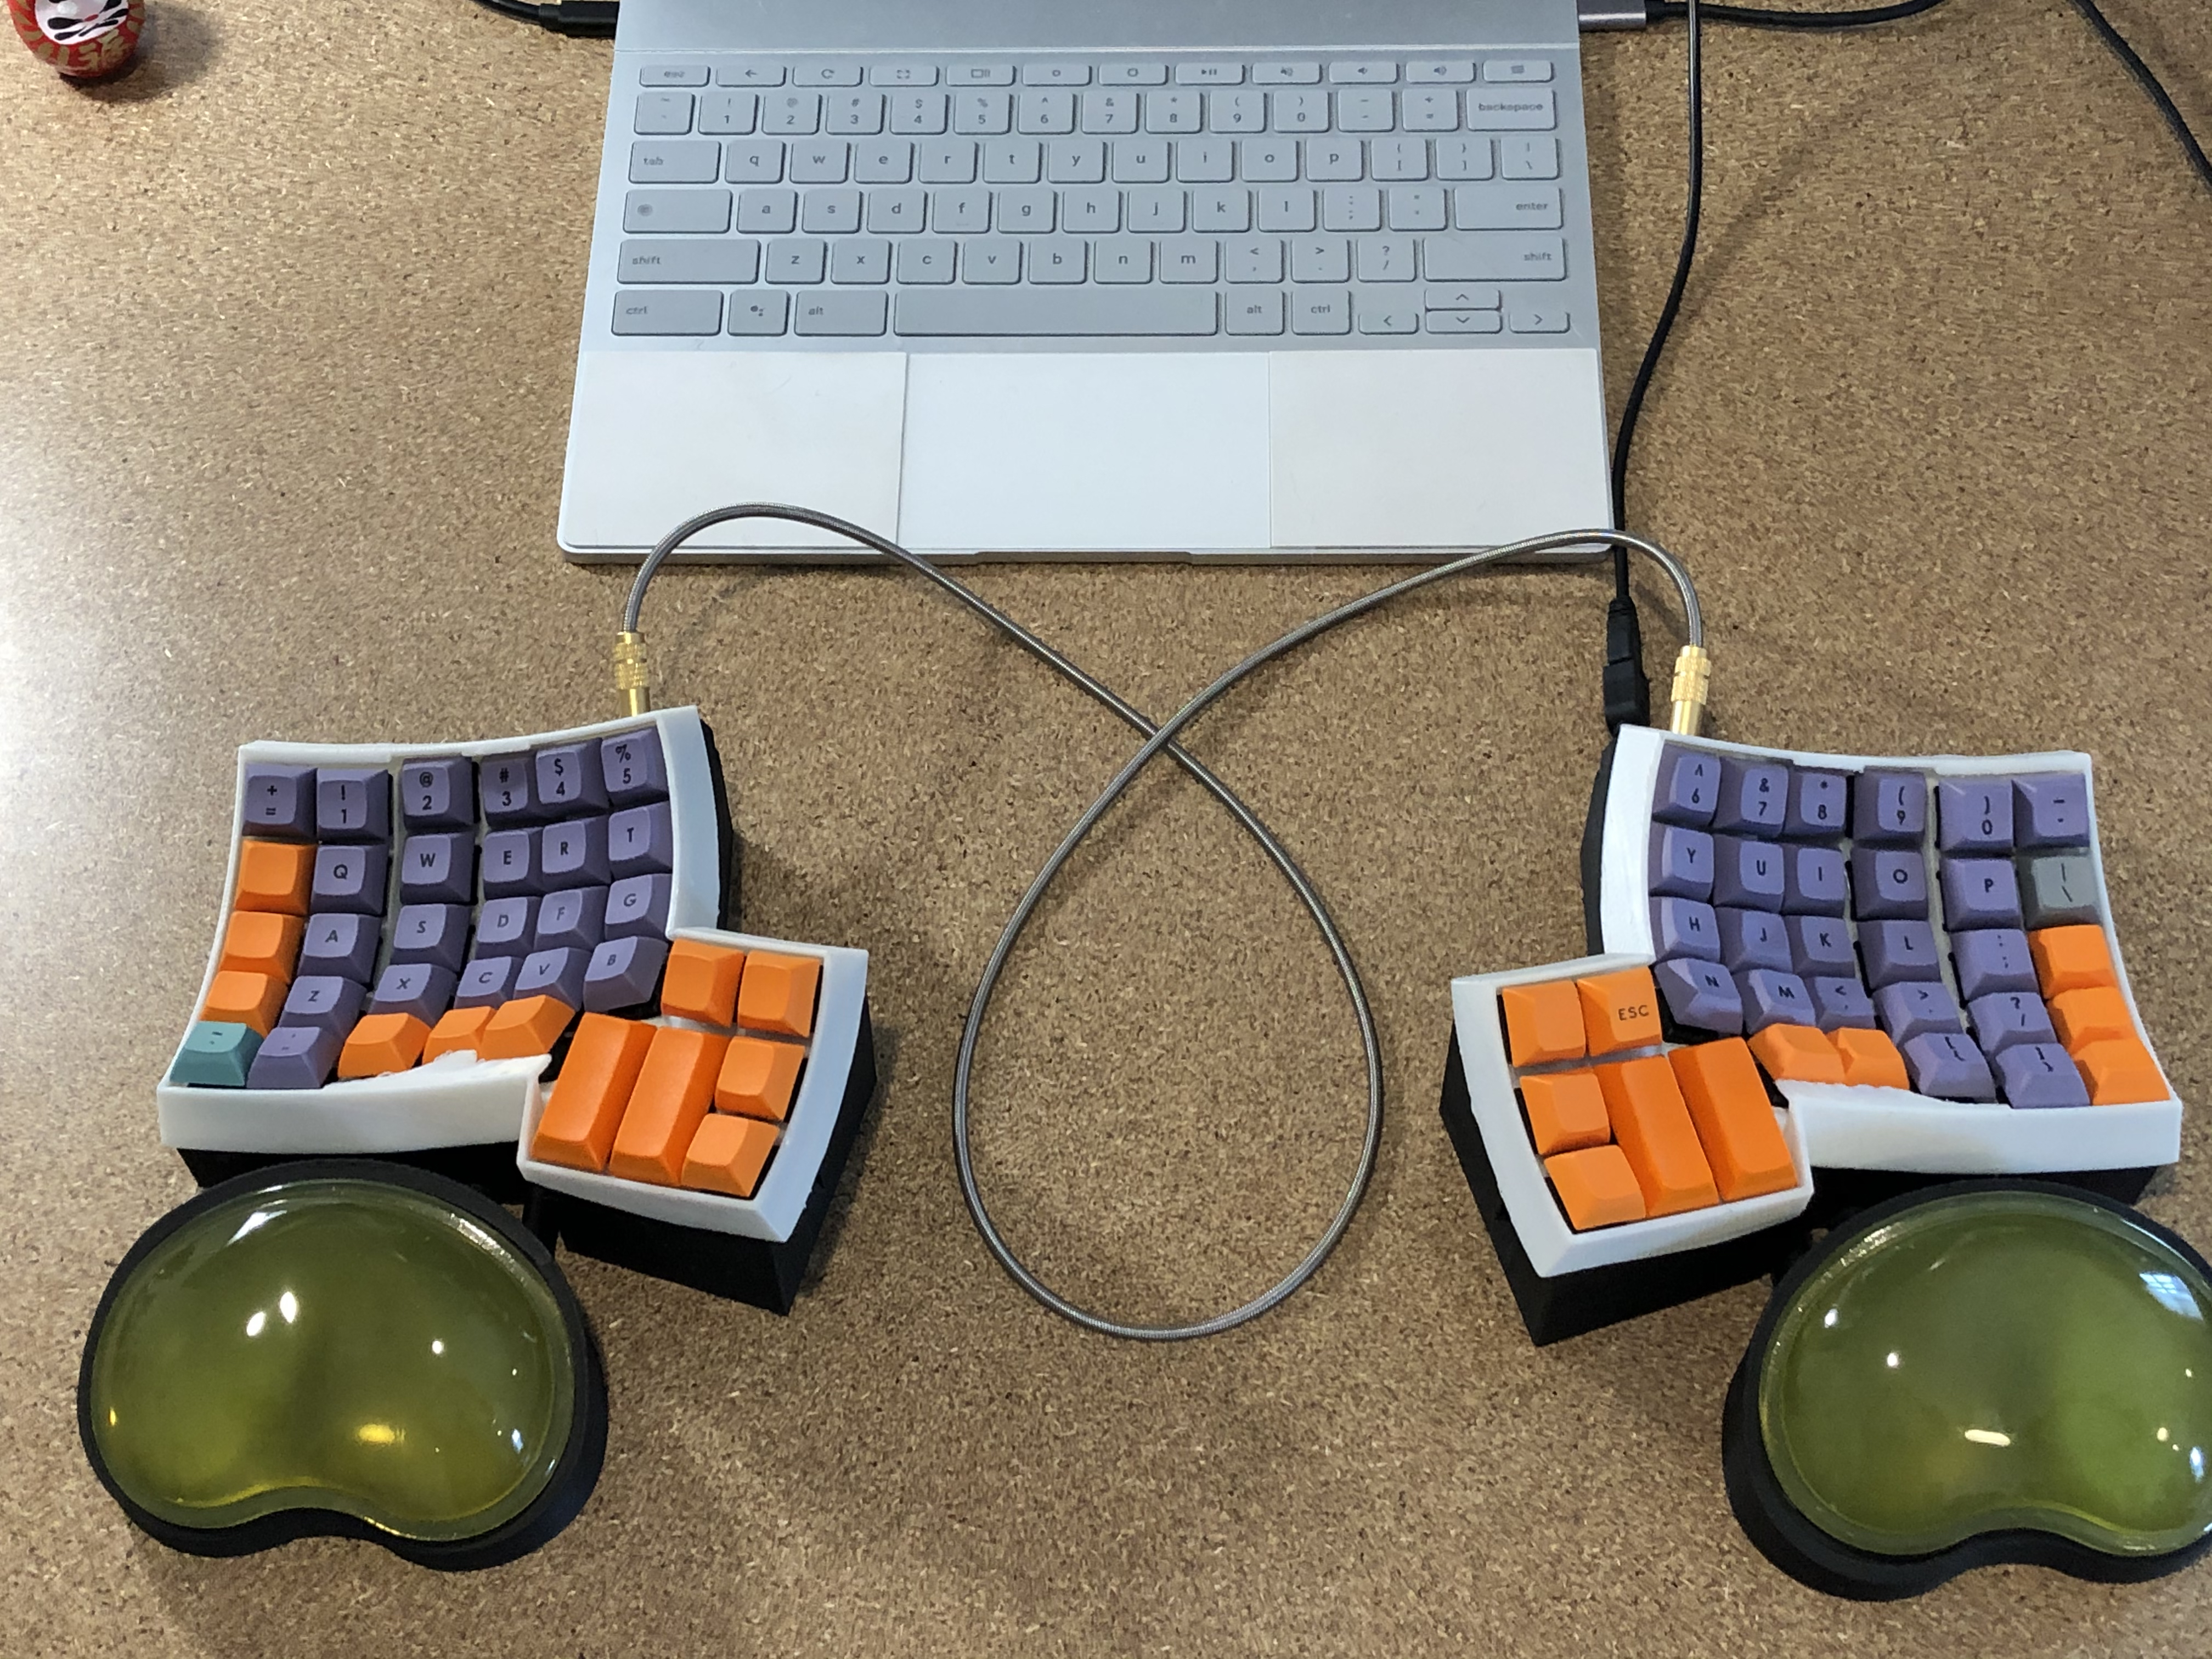
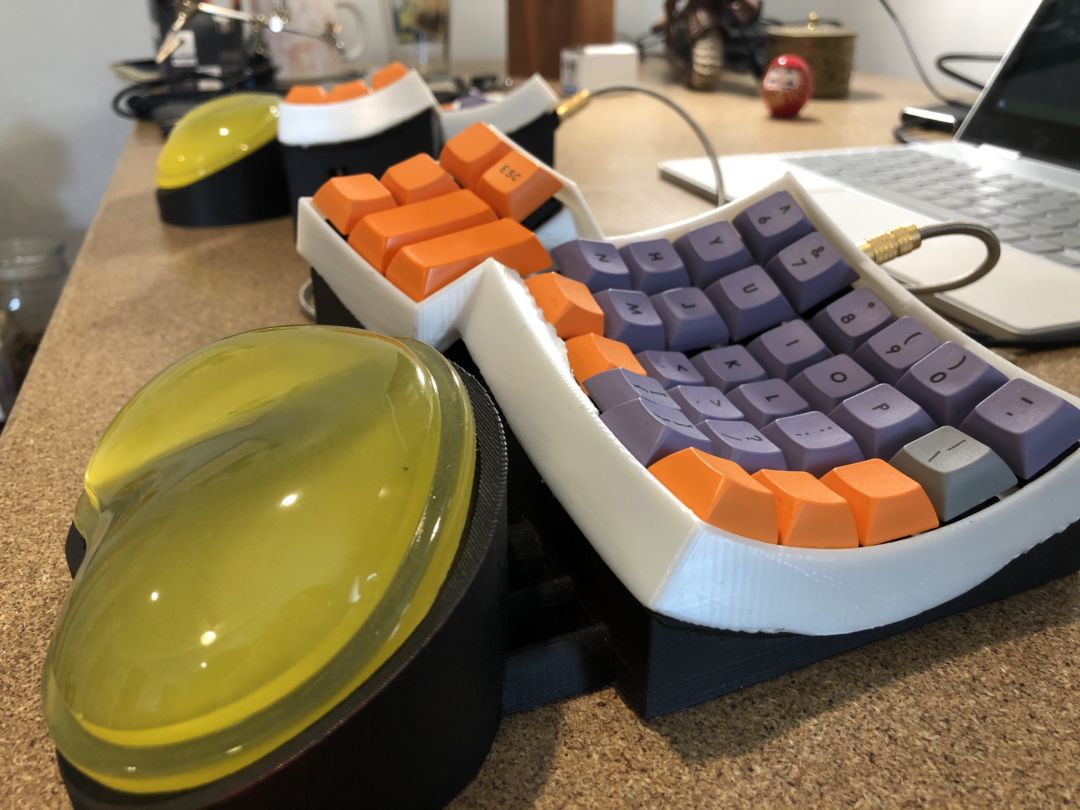
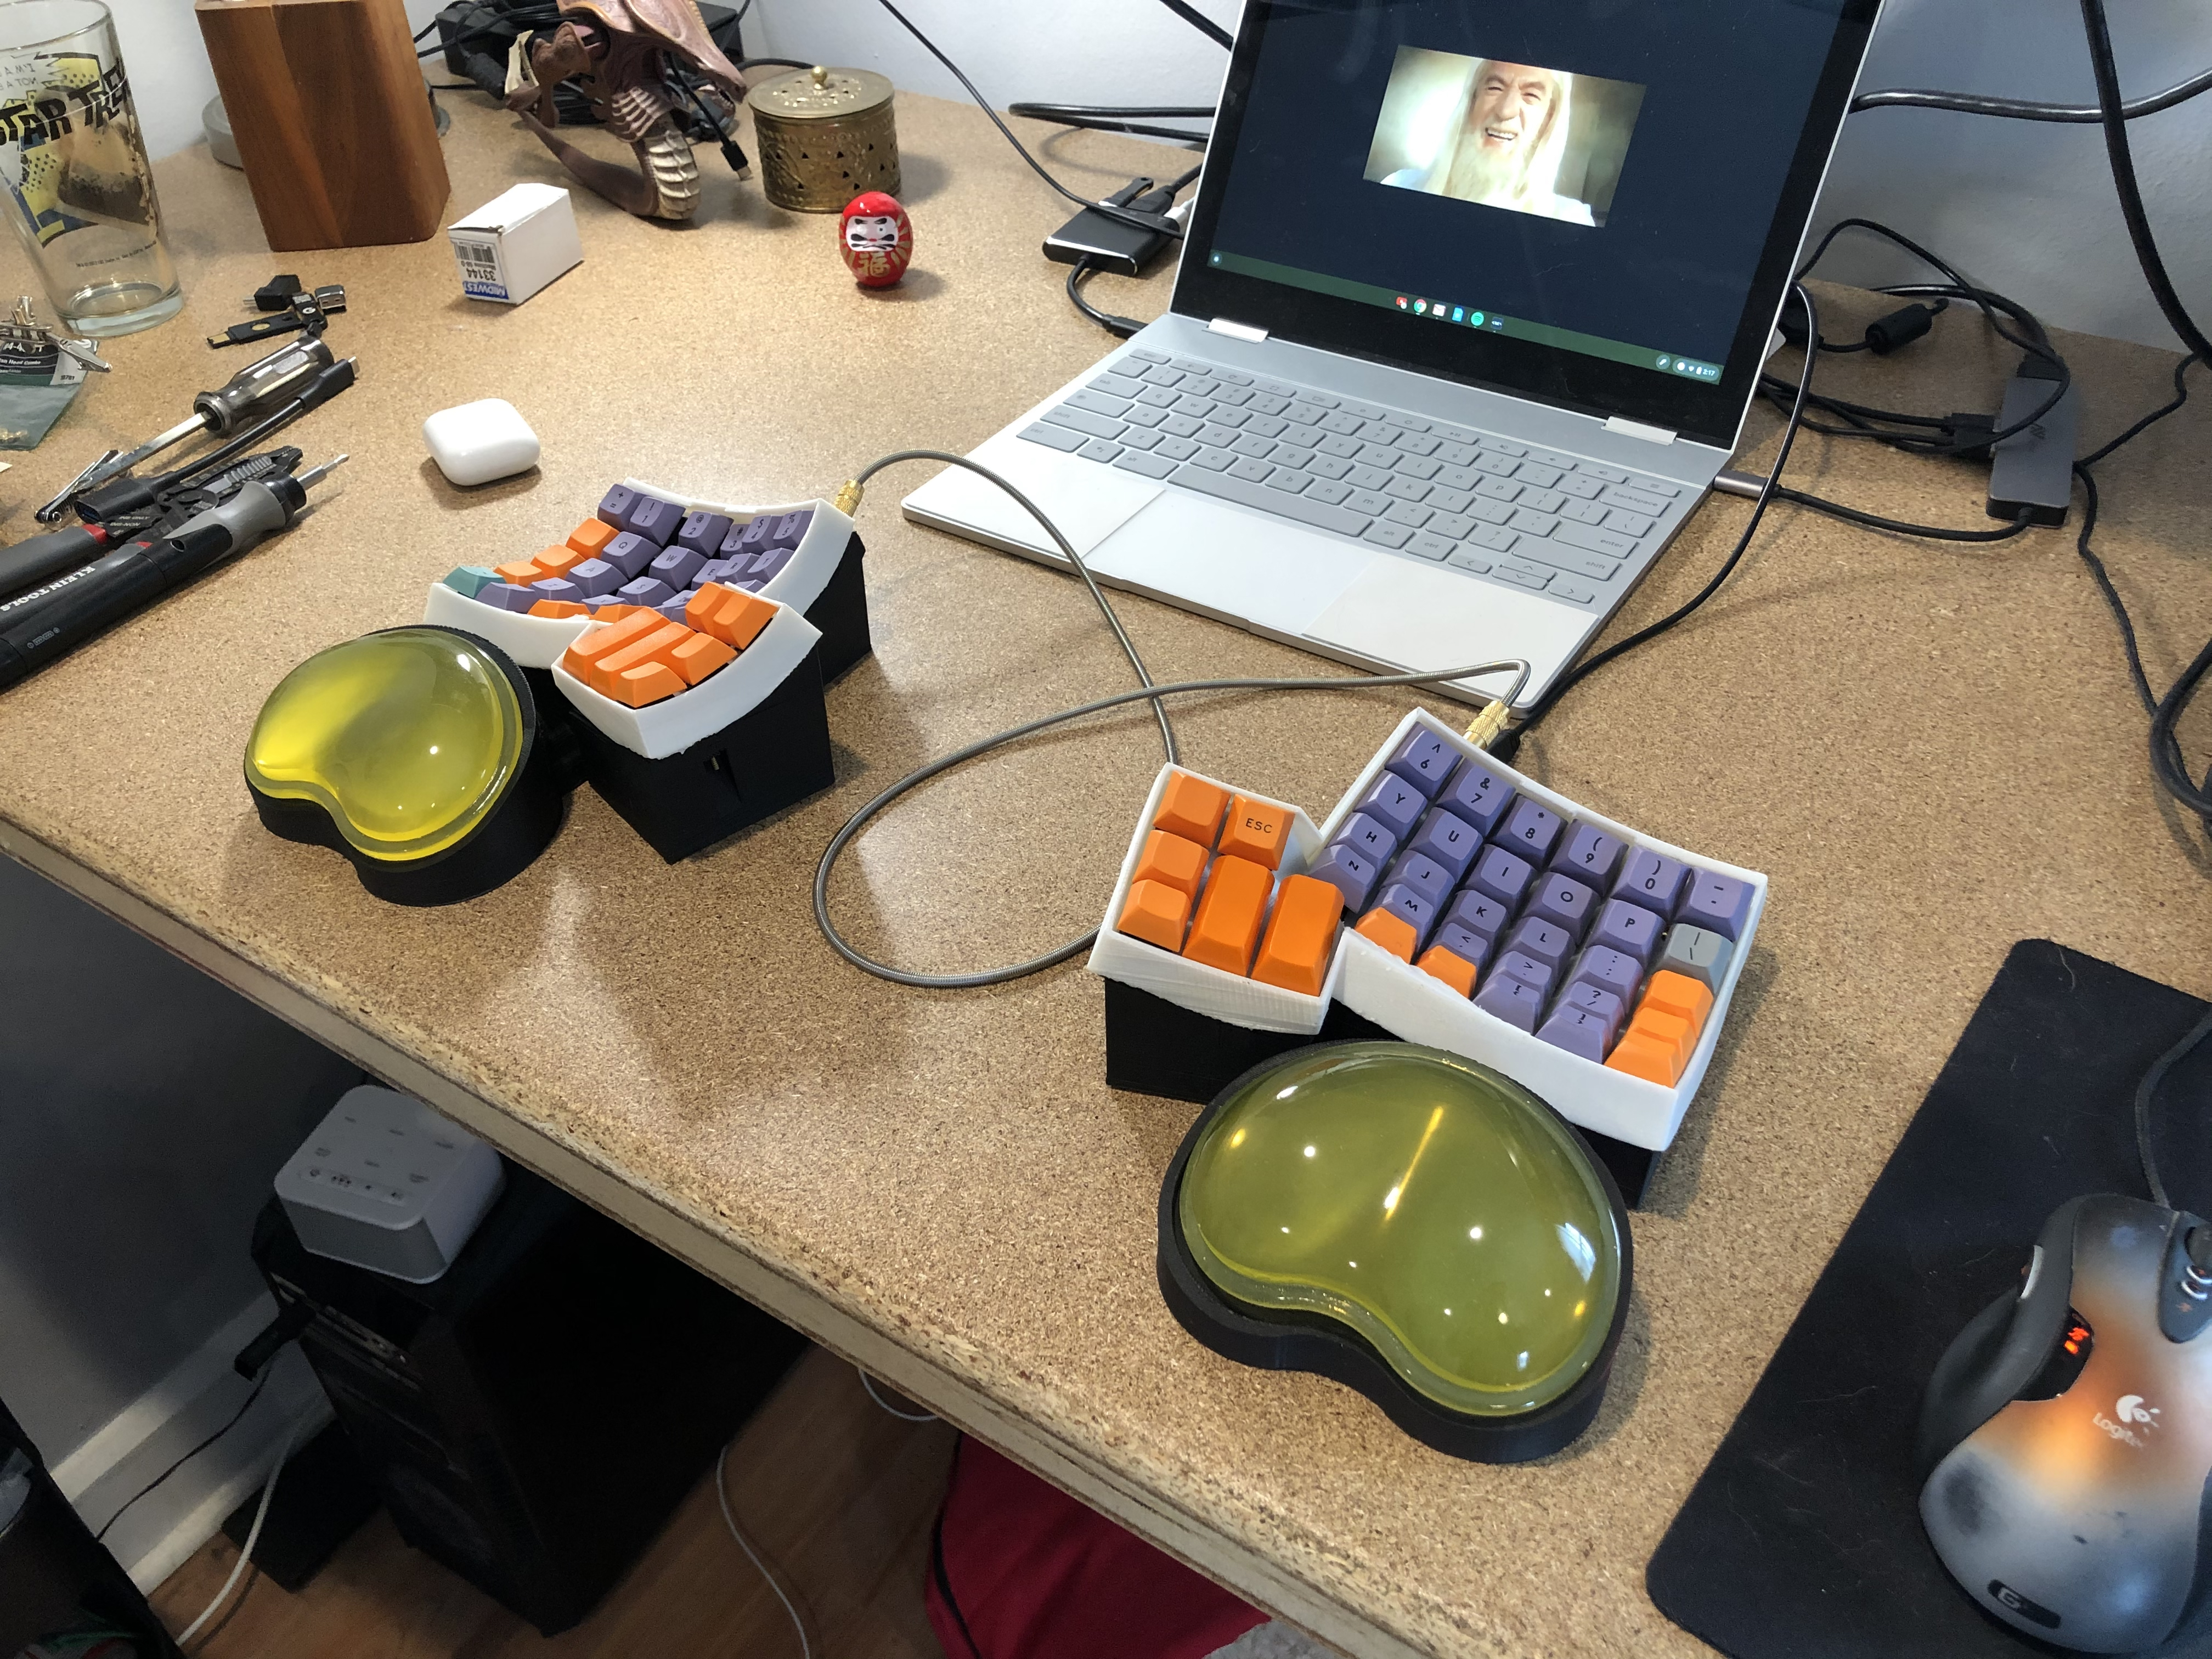
Overall I thought this project would be fast (it wasn't) and cheaper than buying a nice keyboard outright (it definitely wasn't). Despite that, I'm very happy with the results and would encourage anyone to give building a keyboard a chance!